

Wine Cellar Construction, From Plan to Finished Room
Wine cellar construction is the work of turning a room into a controlled environment: temperature that holds at 55 to 58 degrees Fahrenheit, humidity that stays between 55 and 70 percent, light and vibration kept out, and equipment you neither hear nor feel. A proper custom wine cellar is that environment, not a themed closet, and the difference is decided in the envelope, the cooling system and the sequence in which they are built.
This guide is the construction sequence we follow, from the drawings to the day the first case goes in. It is written for architects, contractors and collectors planning a custom wine cellar, with specific guidance on vapour control, insulation, glazing, electrical, lighting, cooling, racking and compliance. Temperature and humidity targets are well established in the wine storage literature; the rest is getting the room to hold them quietly and predictably.
If the room is below grade, our underground basement wine cellar guide covers the site conditions in more depth. If you are still deciding what to build, start with wine cellar design styles and the cost guide.
This is the process our team follows on every custom wine cellar we design and build.
The Wine Cellar Construction Sequence
The stages of a custom wine cellar build, in the order they happen. Durations are typical for a residential room and depend on the site, the trades and the lead time on racking and glass.
| Stage | What happens | Who | Typical duration |
|---|---|---|---|
| 1. Design and drawings | Room location, layout, racking plan, wall assembly, mechanical schedule | Cellar designer with the architect | 2 to 6 weeks |
| 2. Site preparation | Moisture and structural checks, demolition, power and drain brought to the room | General contractor | 1 to 2 weeks |
| 3. Framing and vapour barrier | Walls and ceiling framed, vapour barrier on the warm side, penetrations sealed | Framer | 1 week |
| 4. Insulation | Closed-cell foam or rigid board to the specified R-value, inspected before closing | Insulation contractor | 2 to 4 days |
| 5. Rough-in | Dedicated circuits, lighting wiring, refrigerant lines or ducting, drain line | Electrician, HVAC or refrigeration specialist | 1 week |
| 6. Door and glazing | Insulated door or thermal glass units set and sealed | Door and glass installer | 1 to 2 days |
| 7. Finishes | Moisture-resistant board, flooring, wall and ceiling finishes, paint | Finish trades | 1 to 2 weeks |
| 8. Cooling system and lighting | Unit mounted and connected, controls and lighting scenes set | Refrigeration specialist, electrician | 2 to 3 days |
| 9. Racking installation | Racking anchored to framing, display features and tasting elements fitted | Cellar installer | 2 to 5 days |
| 10. Commissioning | Room run to temperature and humidity and held for a week before wine is loaded | Cellar installer | 1 to 2 weeks |
Racking and glass are usually the long lead items; order them at stage 1 so they arrive when the room is ready. The sections below take each stage in turn.
Wine Cellar Plans: What the Drawings Should Show
A wine cellar built from a sketch is a cellar built twice. The drawings are where construction problems are found cheaply. A complete set shows four things.
Plan and elevations
The room in plan with the door swing, the aisle widths and the racking against each wall, and an elevation of every racking wall showing bottle rows, display features and the height of the top row. This is the drawing the racking is built from.
The wall assembly
A section through the wall and ceiling showing framing, vapour barrier position, insulation type and thickness, and the interior finish. Inspectors ask for it, and it settles the R-value and vapour control before anyone opens a wall.
The mechanical schedule
The cooling system type and model, its location, where heat is rejected, the drain route, the electrical circuits and the lighting circuits with their controls. The cooling load estimator further down this page gives the starting figure.
The finish schedule
Flooring, wall and ceiling materials, door and glass specification, racking material and finish. Every item on it has to tolerate cellar humidity.
We produce these drawings for every project as part of our design process.
Planning And Site Preparation

Where To Install My Custom Wine Cellar?
Prioritize interior spaces or below-grade rooms with minimal solar gain and fewer exterior surfaces. The less exposure to ambient swings, the smaller the heat load and the easier the system’s job. Glass-heavy feature rooms are feasible, but you’ll pay for it in load and equipment capacity; treat glass as a design choice that demands better assemblies and bigger cooling.
Evaluating Structural Integrity & Moisture Conditions
Before any finishes, confirm the substrate is dry and structurally sound. In basements, continuous rigid insulation against concrete and air-impermeable insulation at the rim joist are standard, with no interior polyethylene over those insulated concrete walls to preserve inward drying. Water management, air sealing, and continuous insulation coverage come before aesthetics.
Space Planning & Dimensions
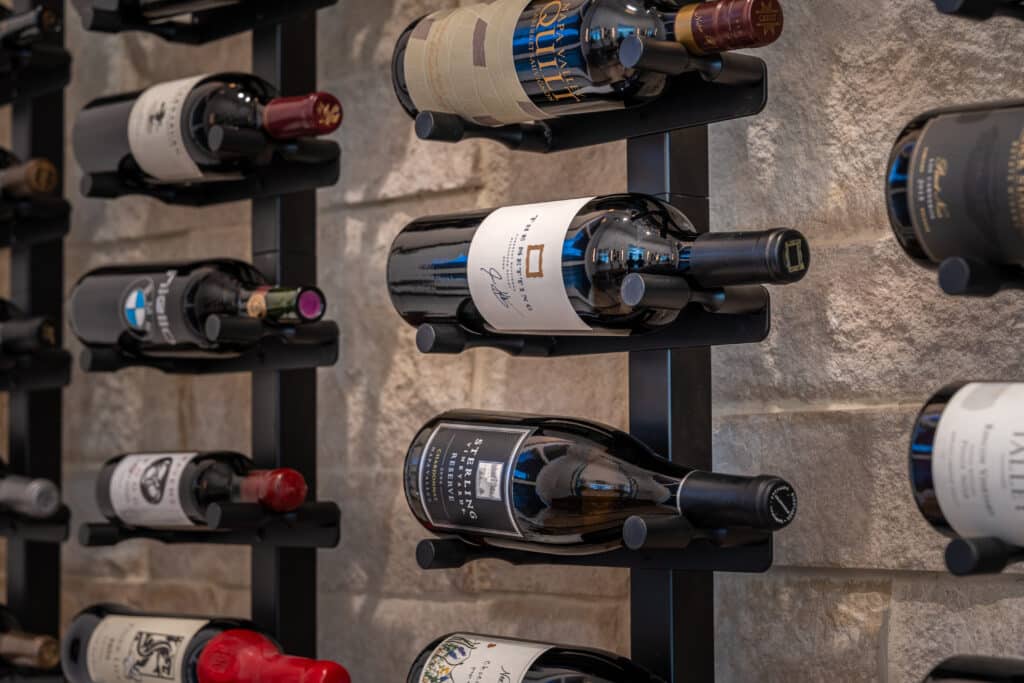
Work from bottles outward. A standard 750 ml bottle is roughly 11.5”-13” tall and 3”-3.25” in diameter; magnums are closer to 13.5”-14” tall and ~4”-4.5” in diameter. That drives rack depths, clearances, and door swings. Keep service aisles practical, 30-36 inches in front of dense storage; more in hospitality programs.
Power & Drainage Requirements
Every active cooling system needs power sized per the manufacturer and a reliable condensate path. Plan dedicated circuits for condensers or fan coils as specified; many wine units explicitly require dedicated circuits and prohibit GFCI on compressor loads to prevent nuisance trips. Always provide a gravity-sloped drain with proper trapping per the installation manual.
Framing, Insulation, And Vapor Barrier Setup
Why Vapor Barriers For Custom Wine Cellars Are Non-Negotiable
Cellars run cool and moderately humid. Without a legitimate vapor control strategy, warm, moist air will drive into the cold room in summer, condensing in assemblies, and vice versa in winter. The point is not “plastic everywhere”; it’s a climate-specific, assembly-specific control layer strategy that allows drying in at least one direction.

Where should you place a vapor barrier in a wine cellar?
To prevent moisture damage, install vapor barriers on the warm side of the assembly. Use continuous rigid insulation against concrete to allow walls to dry inward.
While the “warm-in-winter side” is the standard rule of thumb, below-grade and mixed-climate assemblies require a more nuanced approach. According to Building Science Corporation guidance, wine cellar construction should follow these three technical requirements:
Insulation: Use continuous rigid insulation directly against concrete surfaces.
Vapor Control: Avoid interior polyethylene on concrete walls to ensure they can dry toward the interior.
- Flooring: Do not place a waterproof membrane directly under tile if it is above sub-slab rigid foam. This prevents a “seasonal double vapor barrier” that traps moisture.

Recommended Custom Wine Cellar Insulation Types
- Closed-cell spray foam for air-impermeable insulation at rim joists and as a continuous interior air/vapor retarder where appropriate (R-6 to R-7 per inch typical).
- Rigid foams (XPS, EPS, polyiso) for continuous insulation at foundation walls and slabs.
- Unfaced mineral wool or fiberglass only on the warm side, and only when the cold side is already protected by an air-impermeable layer.
The key is continuity of the air barrier and correct vapor control, not just raw R-value.

Framing Materials & Moisture Resistance
Use standard kiln-dried framing with pressure-treated plates where slab contact exists. For finishes in humid rooms, select mold and moisture-resistant gypsum panels conforming to ASTM C1396; in splash-prone or tile-clad zones, use cement or fiber-cement backer boards.
What are the most common wine cellar construction mistakes?
- Poly on the interior over insulated concrete walls or slabs that trap moisture.
- Missed air-sealing at rim joists and corners.
- Discontinuous rigid insulation at basement walls.
- Waterproof membranes are placed above sub-slab foam in cellars, creating seasonal condensation traps.

Flooring, Walls, And Ceiling Materials
Ideal Flooring Materials
Natural stone and porcelain are low-risk in humid rooms and add thermal mass that dampens temperature swings. If you want the look of wood, limit it to engineered planks over a proper vapor break, and keep humidity tightly controlled to avoid movement.
Avoiding Expansion/Contraction Issues
Cellars sit near 50-60% RH and 50-59℉ / 10-15℃. Engineered wood tolerates that envelope better than solid; porcelain tolerates it best. Maintain a true vapour barrier under slabs and a capillary break beneath to prevent slab moisture wicking.
Wall Paneling Options
Mold-resistant gypsum behind racking is common. For tiled features, use cement backer board. Where you want wood cladding, prefinish both sides and back-prime to reduce moisture uptake.
Ceiling Treatments & Load Considerations
Design ceilings to support any suspended systems (cable racks, pendant lighting, coffered features). Confirm dead load capacity, plus concentrated loads where cable systems or tasting fixtures anchor into structure.
Mold-Resistant Paints & Finishes
Specify low-VOC, mold-resistant coatings from established lines; keep sheens low to reduce glare. Mold-resistant gypsum panels from major manufacturers meet ASTM standards for enhanced resistance.

Cooling And HVAC Wine Cellar Integrations
Cooling load estimator
Estimate the cooling your wine cellar requires
Enter your cellar's dimensions, construction, and setting to see an estimated BTU/hr cooling load, a starting point for choosing the right refrigeration system.
Cellar dimensions
Construction
Door
Climate & target temperature
Target temperature should be lower than the ambient temperature.
Interior loads
This estimator uses standard heat-transfer methodology (U × area × temperature differential) plus door, infiltration, and internal loads, with a 1.25x sizing safety factor. It's meant as a planning starting point; final equipment selection should account for your cellar's exact build and be confirmed with a cellar specialist.
Estimated cooling load
–
Darker surfaces carry more of the total heat gain.
Temperature & Humidity Targets
Target a stable ~45-59 °F / 7-15 °C with moderate humidity around 50-70% RH. Stability matters more than the exact number; fluctuations harm wine more than a steady setpoint slightly off “ideal.” LEDs help by reducing radiant heat and UV.
Types Of Cooling Systems
- Through-the-wall self-contained: Simplest install, visible grille; requires ambient spaces that can accept heat rejection.
- Ducted self-contained: Moves supply/return via ductwork for a cleaner interior look.
- Ducted split: Evaporator in/near cellar; condenser remotely located; quieter with better thermal separation.
- Ductless split: Line-set to an indoor fan coil; minimal ductwork.
Manufacturers publish selection and installation guidance; don’t size on volume alone, perform a heat-load calculation that accounts for glass, infiltration, lighting, people, and adjacent conditions.

Installation Requirements By System Type
Expect dedicated circuits sized by model, proper clearances, vibration isolation for condensers, and a condensate drain with slope and trap. Split systems often require hardwiring, appropriate wire gauge, and crankcase heater energization prior to start-up. Follow the manual; deviations lead to nuisance trips and failures.
Ventilation & Airflow Design Principles
Design supply and return paths to avoid short-circuiting. Duct sizes and splits are specified by models; manufacturers provide tables and layout notes. Exhaust condenser air outdoors or into a room at least three times the cellar volume if recirculating is unavoidable.

Working With HVAC & Refrigeration Specialists
Use licensed refrigeration techs familiar with wine setpoints; many platforms offer remote sensors and controllers to average multiple locations inside the cellar. That guards against hot/cold spots and improves alarm accuracy.
Noise, Condensation, & Drain Line Management
Mount equipment on isolation pads, use soft-close doors, and run drain lines with a minimum 1/4 inch per foot pitch to a proper receptor. Units require a drain; never tie condensate directly into the sanitary line without a code-compliant air gap.

Electrical Load Planning For Cooling Units & Lighting
Cooling equipment often mandates dedicated circuits and specific amperage; some manufacturers warn against GFCI on compressor loads. Coordinate early with electrical to prevent nuisance trips and voltage drop on long runs.
Dedicated Circuits & GFCI Outlets
Under the 2020-2023 NEC, GFCI coverage expanded, including basements and up to 250 V receptacles in specified locations. Check with your AHJ; you may need GFCI on general receptacles while keeping dedicated hardwired cooling on its own non-GFCI branch as allowed by the manufacturer and code.
LED Vs. Halogen Lighting Considerations
LEDs offer negligible UV and lower IR compared with legacy sources, critical to avoid light strike and heat near bottles. Use high-CRI LEDs and dim to taste; reserve halogen for non-cellar zones. The Canadian Conservation Institute provides selection criteria for “excellent” LED sources in collection spaces.
Lighting Placement For Safety & Aesthetics
Aim to graze labels, not corks. Shield sources to avoid glare on glass. Backlight onyx or resin features with diffused, low-wattage strips, and interlock lighting with door contacts or occupancy to reduce exposure time.
Smart Controls & Sensors Integration
Most professional platforms support wall controllers, remote sensors, and alarms. Wireless is convenient; wired is more reliable. Integrate leak detectors and door sensors into the same ecosystem.
Door And Glazing Specifications
Double-Pane Or Low-E Glass Options
Typical double-pane low-E units range roughly from U-0.20-0.40 (whole window), translating to about R-2.5-R-5 depending on makeup. Frame, spacers, and installation drive the true assembly U-factor; don’t quote center-of-glass values as whole-door performance.
Thermally Insulated Wine Cellar Doors
A solid insulated door typically delivers R-5 to R-6 performance; solid wood is closer to R-2-R-4. If you want glass, compensate elsewhere in the envelope or in the HVAC capacity.
Sealing & Threshold Details
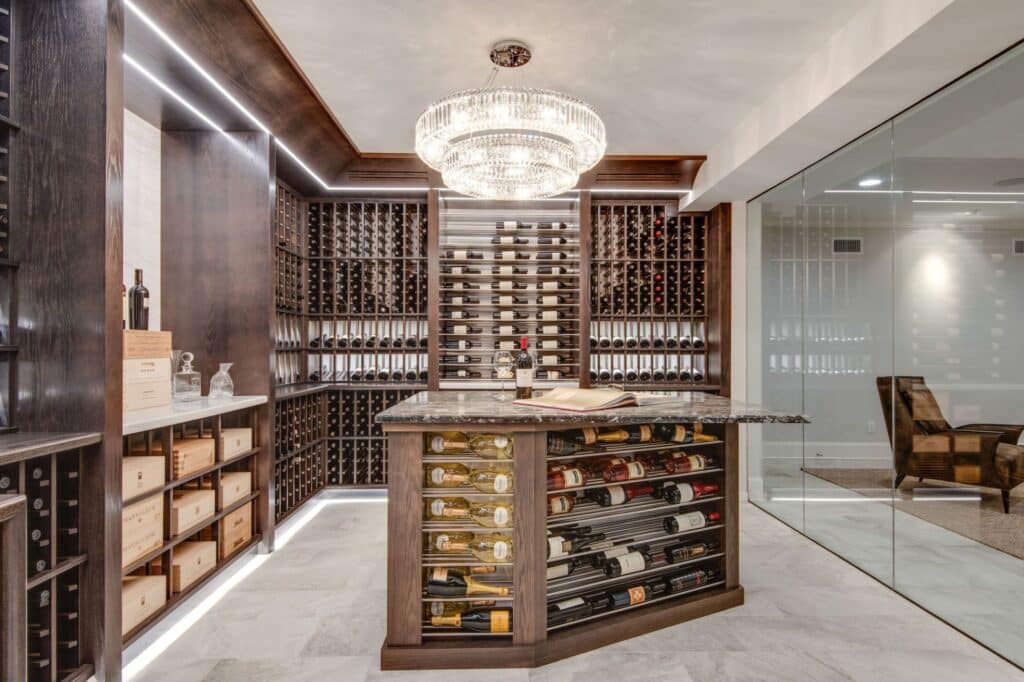
Frameless glass can work if you treat it like a museum case: Perimeter weatherstrips, door sweeps or automatic bottoms, and continuous thresholds to limit infiltration. Hardware houses supply brush and bulb weatherstrip kits for all-glass doors; use them.
R-Value Requirements For Glass Vs. Solid Doors
There’s no one “required” R-value; the right answer is a balanced heat-load calculation that includes the door’s U-factor. As a rule, more glass means higher cooling capacity and tighter lighting discipline. Use laminated, low-iron glass with UV-screening interlayers where daylight or bright display lighting is present; standard PVB interlayers screen >99% of UV below ~380 nm, with specialty interlayers extending protection to 400 nm.
Racking, Shelving, And Finishing Touches
Material Types
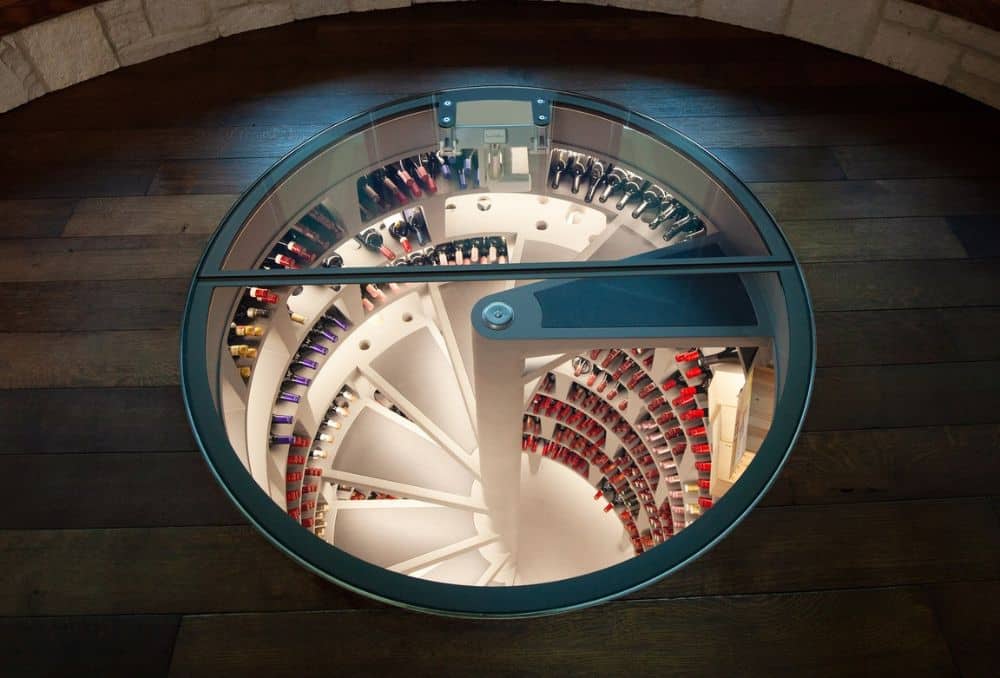
Review the material matrix here for quick comparisons of wood, metal, glass, and composite options by style and environment: Use corrosion-resistant fasteners, and keep ferrous components away from damp zones without a protective finish.
Installation Techniques & Load-Bearing Tips
Anchor into framing or engineered blocking. For floating and cable systems, verify substrate capacity and use manufacturer-rated anchors and tensioners. For high-density walls, plan blocking at layout, not after drywall.
Mounting To Studs Or Wall Systems
Bottle-forward and peg systems load the wall differently than cubbies. Continuous plywood backing behind gypsum (or metal studs with hat channels and plates) simplifies anchor placement while keeping surfaces flush.
Custom Finishes & Protective Coatings
Low-VOC, water-borne polyurethanes and conversion varnishes reduce odor risk in closed rooms. Metalwork benefits from powder coats or clear coats over brass/bronze to control patina in humid air.
Integration With Tasting Tables Or Display Zones
Treat tasting ledges and tables as thermal and airflow objects. Avoid obstructing supply/return paths, and isolate any heat-emitting elements (audio, displays) from bottle zones.

Wine Cellar Installation: What Happens On Site
Installation is where the drawings meet the site. Four rules keep it on schedule.
Close the envelope before anything else
Vapour barrier, insulation and finishes are complete and inspected before the door, the cooling unit or the racking arrive. A cellar finished out of order is a cellar that leaks conditioned air.
Set the door and glass, then the equipment
The door and any glazing seal the room. The cooling system is mounted, connected and tested only once the room can hold air.
Rack last, and anchor to structure
Racking is fitted after finishes are complete, anchored into framing or engineered blocking, never into gypsum board alone. Display and tasting elements go in with the racking so everything aligns.
Commission before loading
Run the room empty for a week at temperature and humidity, check the drain and the door seal, and set the lighting scenes. Then load the wine.
Our installation teams handle the door, equipment and racking stages on every project; the trades before them follow the drawings.
Building Codes, Permits, And Compliance
Local Permit Requirements For Residential Vs. Commercial Cellars
Permits are jurisdictional. Expect review of structural changes, electrical circuits, mechanical equipment, glazing, and egress. Commercial programs add accessibility and life-safety layers. Document the envelope (insulation R-values, air/vapor strategy) and mechanical schedules in the submittal set.
Moisture & Electrical Code Considerations
Inspectors scrutinize vapor control in below-grade work and GFCI locations. Recent NEC cycles expanded GFCI coverage, including basements and higher-voltage receptacles in specified locations; coordinate dedicated, non-GFCI hardwired branches for equipment if permitted and required by the manufacturer.
Fire-Safety, Ventilation, & Access Regulations
Use listed materials where fire ratings are required. Don’t vent condensers into small mechanical closets; exhaust outdoors or into adequately sized spaces per the manual. Maintain clearances around equipment and safe access for service.
Working With Inspectors & Contractors
Bring manufacturer manuals to inspections. Demonstrate that your drain, electrical, and air paths match documentation. The fastest approvals come from clean detailing and clear documentation.


Hiring The Right Wine Cellar Contractor
What To Look For In A Specialist Builder
You want a crafter fluent in building science, refrigeration, and millwork. Ask for projects with laminated UV-screening glass, ducted split systems, and complex racking. Verify they own a thermal camera and hygrometers and can explain their vapor strategy. Contact Genuwine Cellars to discuss your project.
Looking for wine cellar contractors who handle design, engineering and installation in one team? Start here.
Key Questions To Ask Before Hiring
Use this checklist.
Understanding Warranties & Post-Installation Support
Look for warranty coverage on the envelope, equipment, and racking, plus a documented maintenance path: filter cleaning, drain inspection, and controller updates.
Begin Your Masterpiece
Tell us about your collection and the room, and our wine cellar specialists will take it from there.
Frequently Asked Questions About Wine Cellar Construction
What type of insulation should be used in a wine cellar?
Closed-cell spray foam for air-impermeable layers at rim joists and as a controlled vapor retarder where appropriate; rigid foam continuously against concrete; unfaced batts only when the cold side is isolated by an air-impermeable layer. Continuity and correct vapor placement matter more than brand.
Where should the vapor barrier be placed in a wine cellar wall assembly?
There’s no universal plastic-on-the-inside rule. In basements, insulate the concrete with continuous rigid foam and avoid interior polyethylene so the wall can dry inward. In BSC’s wine-cellar floor detail, avoid a waterproof membrane directly above sub-slab foam to prevent a seasonal double vapor barrier.
What R-value is recommended for wine cellar insulation?
Walls commonly target R-19 and ceilings R-30 in practice, but the critical piece is continuous insulation and air sealing around the entire envelope. Sub-slab rigid foam improves comfort and reduces condensation risk. Always reconcile target R-values with the heat-load calculation.
Do I need a separate HVAC system for my wine cellar?
Yes. Condition the cellar independently. Wine cooling units are designed for low-temp, moderate RH setpoints, with proper condensate management and dedicated circuits. Split and ducted systems move noise and heat away from the room.
How do I prevent condensation inside a wine cellar?
Get the envelope right: Continuous air barrier, correct vapor control, and appropriate insulation. Seal door perimeters and thresholds, specify laminated UV-screening glass where daylight is present, and manage condensate with pitched, trapped drains. Keep lighting low-heat and low-UV.
What flooring materials are best for wine cellars?
Natural stone and porcelain are the lowest-risk. Engineered wood works with tight humidity control and a proper sub-slab vapor barrier.
Can a wine cellar be built on an exterior wall?
Yes, but expect higher heat loads and more rigorous detailing. Increase continuous insulation at that face, select better glazing if using glass, and size the cooling system accordingly. “More glass = more load” is a reliable planning heuristic.
How do you calculate cooling load for a wine cellar?
Use a heat-load calculator that accounts for volume, surface assemblies, insulation, air leakage, glass, lighting, and usage. Never size on cubic footage alone. Compare outputs with major manufacturers’ calculators for a sanity check.
What is the best wood to use for a custom wine cellar?
Redwood and mahogany are the top choices because they resist warping and rot in a cool, humid cellar environment. Both need to be kiln-dried and properly sealed before installation so the wood stays stable and doesn't absorb moisture over years of use.
How long does wine cellar construction take?
A residential custom cellar usually takes eight to twelve weeks on site from site preparation to commissioning, plus the design period and the lead time on racking and glass. Complex glass rooms and commercial cellars take longer.
Can I build a wine cellar myself?
A capable homeowner can frame and insulate a small room, but the vapour barrier, cooling system and electrical work decide whether the cellar holds its conditions, and mistakes there are expensive to find later. Most projects pair a general contractor with a wine cellar specialist for the envelope, equipment and racking.
How much does wine cellar construction cost?
It depends on the size of the room, the envelope work required, the cooling system and the racking. Our custom wine cellar cost guide sets out the ranges by type of cellar, and every project is quoted after design.

Robb Denomme is the founder and CEO of Genuwine Cellars, North America’s leading designer and manufacturer of custom wine cellars for luxury residences, hotels, and commercial spaces. His entrepreneurial journey began at just 17, when he and his business partner launched their first wine cellar venture. Combining early construction experience with a deep appreciation for fine craftsmanship, Robb transformed a small local operation into a global enterprise serving elite clients across North America.
Under his leadership, Genuwine Cellars has become synonymous with luxury architecture, design excellence, artisanal precision, and innovation in climate-controlled wine storage. Over three decades, the company has pioneered bespoke cellar systems, integrated digital monitoring solutions, and cutting-edge materials that redefine the modern wine environment. Genuwine’s work now features in some of the world’s most exclusive homes, restaurants, and hospitality properties.
Robb continues to lead Genuwine’s vision for innovation and artisanal craftsmanship, shaping the industry’s standards for both technical performance, luxury, and aesthetic design. As a recognized authority on luxury cellar construction, Robb contributes insights on design trends, architectural integration, and advanced storage technologies.
Credentials & Experience
30+ years in luxury wine cellar design and manufacturing
Founder and CEO, Genuwine Cellars (est. 1995)
Featured in BDC’s Young Entrepreneur Awards and multiple national business publications
Collaborator with architects, builders, and designers across high-end residential and commercial sectors